Beranda
/ Putting Up Tile Backsplash - Easy Diy Subway Tile Backsplash Tutorial Dream Book Design : No need to mess with mixing grout, wiping it clean, making a mess.
Putting Up Tile Backsplash - Easy Diy Subway Tile Backsplash Tutorial Dream Book Design : No need to mess with mixing grout, wiping it clean, making a mess.
Insurance Gas/Electricity Loans Mortgage Attorney Lawyer Donate Conference Call Degree Credit Treatment Software Classes Recovery Trading Rehab Hosting Transfer Cord Blood Claim compensation mesothelioma mesothelioma attorney Houston car accident lawyer moreno valley can you sue a doctor for wrong diagnosis doctorate in security top online doctoral programs in business educational leadership doctoral programs online car accident doctor atlanta car accident doctor atlanta accident attorney rancho Cucamonga truck accident attorney san Antonio ONLINE BUSINESS DEGREE PROGRAMS ACCREDITED online accredited psychology degree masters degree in human resources online public administration masters degree online bitcoin merchant account bitcoin merchant services compare car insurance auto insurance troy mi seo explanation digital marketing degree floridaseo company fitness showrooms stamfordct how to work more efficiently seowordpress tips meaning of seo what is an seo what does an seo do what seo stands for best seotips google seo advice seo steps, The secure cloud-based platform for smart service delivery. Safelink is used by legal, professional and financial services to protect sensitive information, accelerate business processes and increase productivity. Use Safelink to collaborate securely with clients, colleagues and external parties. Safelink has a menu of workspace types with advanced features for dispute resolution, running deals and customised client portal creation. All data is encrypted (at rest and in transit and you retain your own encryption keys. Our titan security framework ensures your data is secure and you even have the option to choose your own data location from Channel Islands, London (UK), Dublin (EU), Australia.
Putting Up Tile Backsplash - Easy Diy Subway Tile Backsplash Tutorial Dream Book Design : No need to mess with mixing grout, wiping it clean, making a mess.. 1) prepping the wall, 2) creating a layout, 3) attaching the tiles, and then 4) applying the grout and finishing. Kitchen backsplash tile installations need a solid support beneath the bottom row. To install a mosaic tile backsplash in a kitchen: Flatten the tile with a grout float if necessary. Speedtile from the home depot, self adhesive backed tiles.
Home improvement can be messy business! The following will walk you through the four stages of installing a tile backsplash: This surface will be the foundation, which holds your beautiful backsplash together over the years, and a crumbling foundation will shorten the lifespan. They have several shapes and types, so it can fit the style you desire. Cover the countertop with plastic sheeting held in place with masking tape.
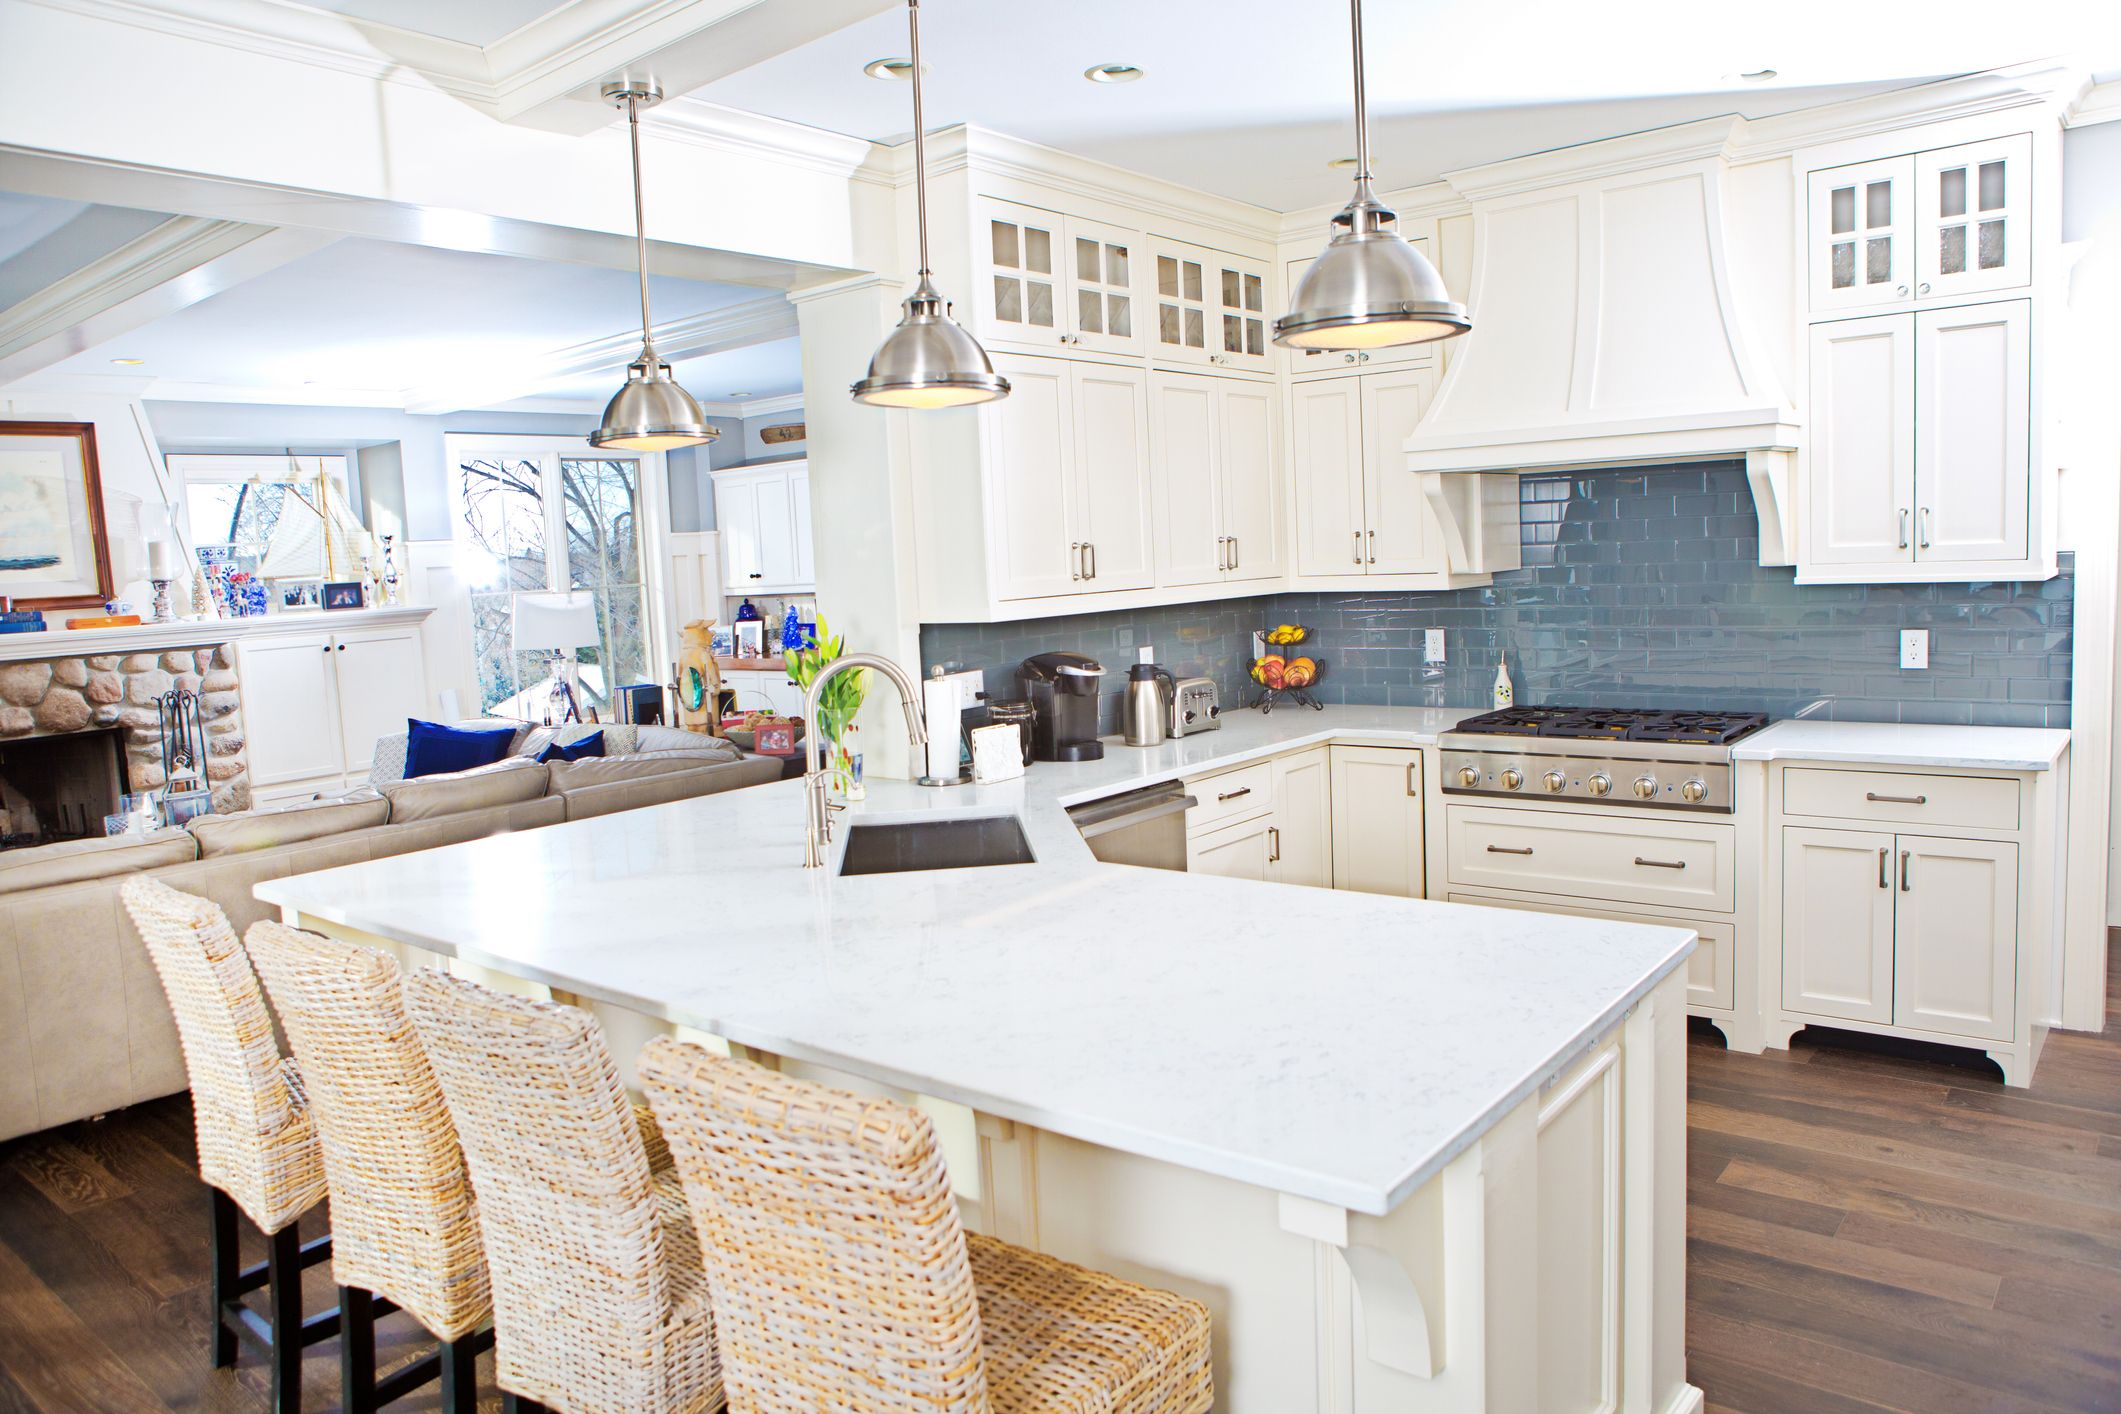
Kitchen Backsplash Tiling How To Tile A Backsplash from hips.hearstapps.com A friend offered to lend us a wet saw and we accepted, hoping we wouldn't actually need to use it. If you use a notched trowel, the grooves may also show through the tiles. If you're installing glass tile over colors or patterns, note that they will show through. Set a center point find the center of the wall that best suits your tile selection and mark a vertical line. Installing a traditional tile backsplash in your kitchen requires several different items. Using accent tile trims is the most common way to finish a kitchen backsplash edge. Lay out the location of the backsplash on the wall. Some types of trim are bullnoses, flat liners, chair rails, pencil liners, and so on.
Adjust the layout to fit the space step 1:
Some types of trim are bullnoses, flat liners, chair rails, pencil liners, and so on. The top objective is to create a smooth and uniform surface on the drywall for the tile to be evenly placed. Place one tile (or one sheet of tiles) on the wall at a time. Depending on your tile choice, a fairly inexpensive tile cutter and nipper combination will be enough to handle most of the straight cuts. Cover the countertop with plastic sheeting held in place with masking tape. Want a pallet wall look, without the upkeep? Once you're done with the 4 foot (1.2 m) row segment, apply more mastic and place more tile on the wall. Tap the tile into the mastic with a wood scrap and a rubber mallet. Speedtile from the home depot, self adhesive backed tiles. If looking to update your kitchen's look, a tile backsplash. Use liquid nails, and pay attention to the spacing to see if your tile and grout lines show through. A tile backsplash is a great way to change the look and feel of your kitchen. Set a center point find the center of the wall that best suits your tile selection and mark a vertical line.
A friend offered to lend us a wet saw and we accepted, hoping we wouldn't actually need to use it. Kitchen backsplash tile installations need a solid support beneath the bottom row. Make sure the tile is lined up properly and perfectly straight before moving on. Once you're done with the 4 foot (1.2 m) row segment, apply more mastic and place more tile on the wall. How to install a simple subway tile kitchen backsplash.
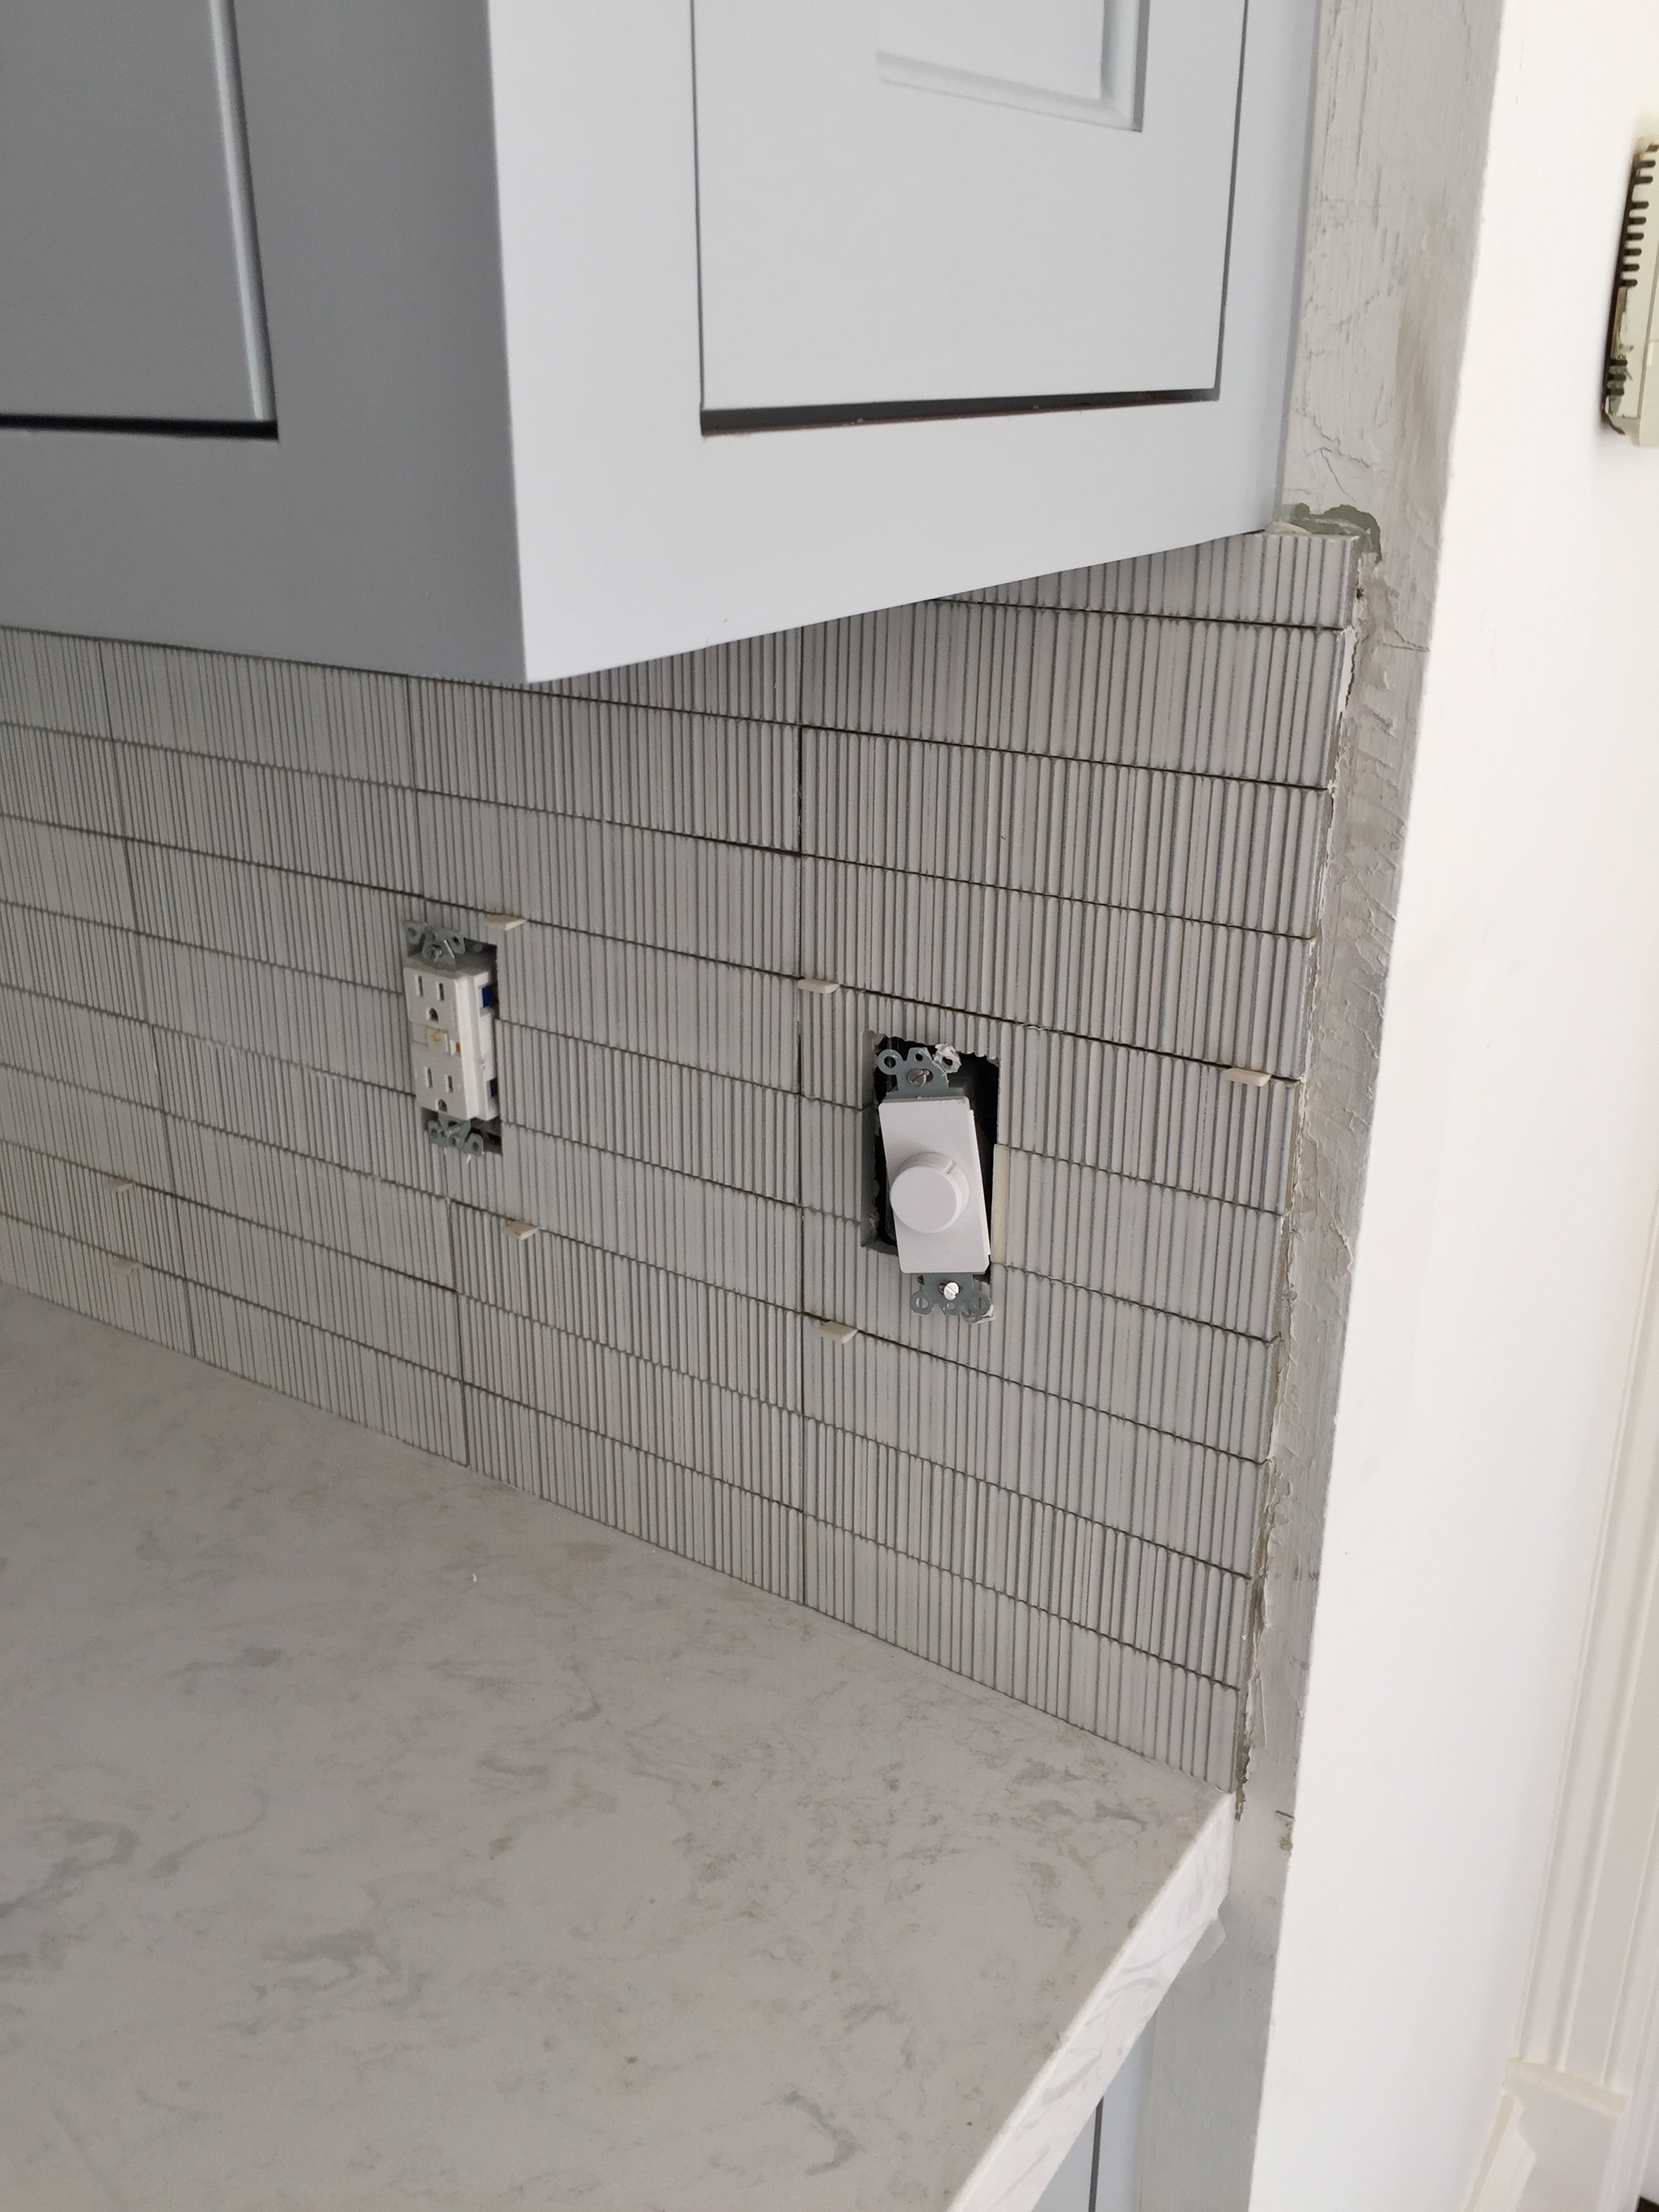
How To Install A Tile Backsplash How Tos Diy from diy.sndimg.com How to install a simple subway tile kitchen backsplash. Joint between sheets of tile (you don't need spacers). Follow the lines you made when the tiles were dry fit to the wall. Remove the faceplate and install the backsplash around the outlet first. Installing a traditional tile backsplash in your kitchen requires several different items. If you're installing glass tile over colors or patterns, note that they will show through. Using accent tile trims is the most common way to finish a kitchen backsplash edge. If you use a notched trowel, the grooves may also show through the tiles.
The following will walk you through the four stages of installing a tile backsplash:
Simple, peel and stick installation eliminate the need for mortar or grout and no contractor is. Tap the tile into the mastic with a wood scrap and a rubber mallet. Adjust the layout to fit the space step 1: The backsplash space between a countertop and wall cabinets usually can be filled with two or three horizontal tile rows, depending on the size of your tiles. Remove the faceplate and install the backsplash around the outlet first. Measure the backsplash area where the tiles will be installed. Depending on your tile choice, a fairly inexpensive tile cutter and nipper combination will be enough to handle most of the straight cuts. The following will walk you through the four stages of installing a tile backsplash: If you use a notched trowel, the grooves may also show through the tiles. Once you're done with the 4 foot (1.2 m) row segment, apply more mastic and place more tile on the wall. Mark off an area of the same size and shape on the floor nearby. Using accent tile trims is the most common way to finish a kitchen backsplash edge. Make sure you are fully prepared before starting your project.
Separate your tiles with 1/8 inch (.32 cm) tile spacers. Learn how to install a tile backsplash. Continue this process until you've covered the majority of your drywall with complete tiles. The materials you need to have prepared before you begin include your tile, tile adhesive, and grout. Home improvement can be messy business!
Don T Leave Your Kitchen Backsplash Hanging In Midair Designed from images.squarespace-cdn.com Lay out the location of the backsplash on the wall. The following will walk you through the four stages of installing a tile backsplash: Joint between sheets of tile (you don't need spacers). Simple, peel and stick installation eliminate the need for mortar or grout and no contractor is. Add tile spacers for help keeping the tile pieces lined up. If you're installing glass tile over colors or patterns, note that they will show through. No need to mess with mixing grout, wiping it clean, making a mess. Prior to preparing your walls for the installation of your tile backsplash, make sure to measure your wall accurately to determine the amount of tiles that you need to cover the area.
Set a center point find the center of the wall that best suits your tile selection and mark a vertical line.
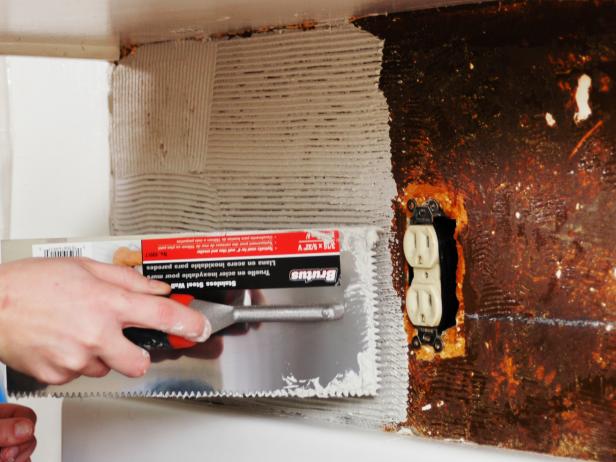
Kitchen backsplash tile installations need a solid support beneath the bottom row. No need to mess with mixing grout, wiping it clean, making a mess. It ended up being a lifesaver when we were working around the outlets. Remove the faceplate from the outlet before you install the backsplash so that the plate will sit on top of the tiles and hide the edges after you extend the outlet. If looking to update your kitchen's look, a tile backsplash. For a smooth, opaque finish, apply the new tile with a solid white adhesive and a smooth trowel. The top objective is to create a smooth and uniform surface on the drywall for the tile to be evenly placed. Place one tile (or one sheet of tiles) on the wall at a time. If you use a notched trowel, the grooves may also show through the tiles. Lay out the location of the backsplash on the wall. Adjust the layout to fit the space step 1: Depending on the tile that is to be installed, and where it will be installed, it is sometimes approp. Slightly rock the sheet up and down, perpendicular to the trowel lines, to collapse the ridges and help the tile settle into place.